Digital Bodies
Class two - 3 October 2017
Making a Me-nnequin.
I have previous experience in making 3D scans of people, as it is one of the funniest assignment I give my students in the digital fabrication classes I teach in Shanghai. Good results can be achieved with inexpensive equipment, a few tricks and some experience.
I use the Kinect sensor and Skanect as a software to acquire the scan. When using the kinect, I found it is important, in order to get best result, to avoid direct sunlight or even perform the scan at night: the scanner uses infrared light which can be interferred by sunlight.
Another trick is to mount the Kinect on a tripod and keep it steady, while rotating the object of the scan. These tricks will get you the best geometry achievable with a 15$ hardware.
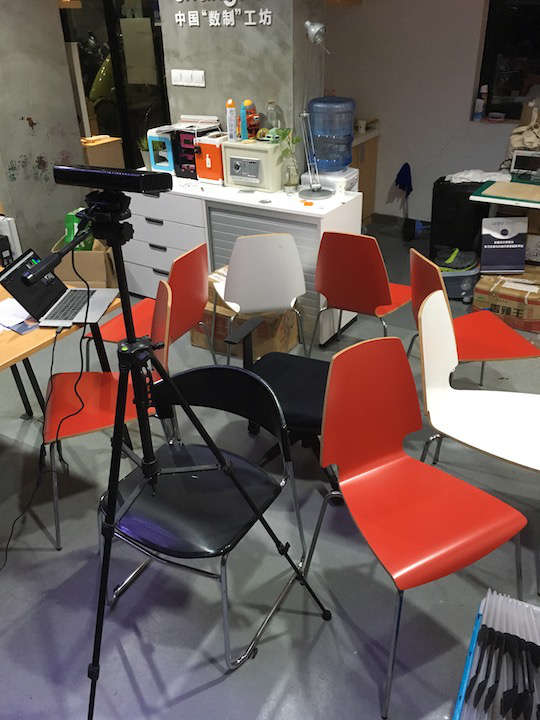
Skanect sensor on a Tripod.
My setup, an office chair sorrounded by other chairs I could hold on to rotate myself.
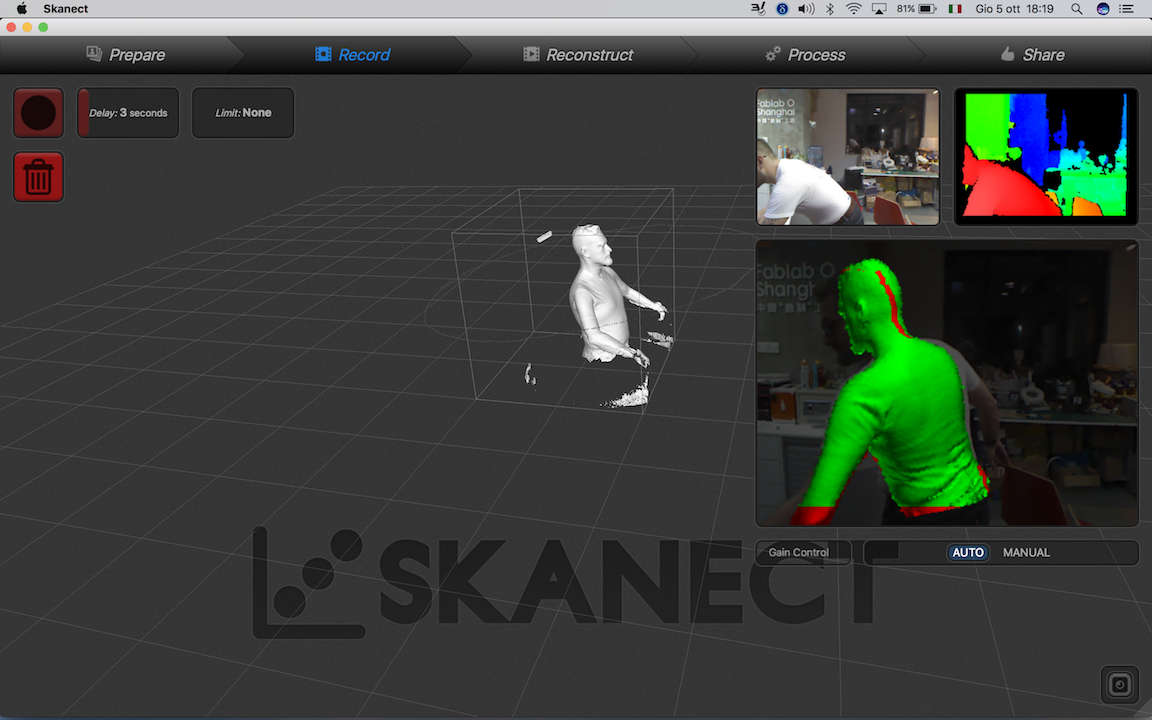
Performing the scan on Skanect.
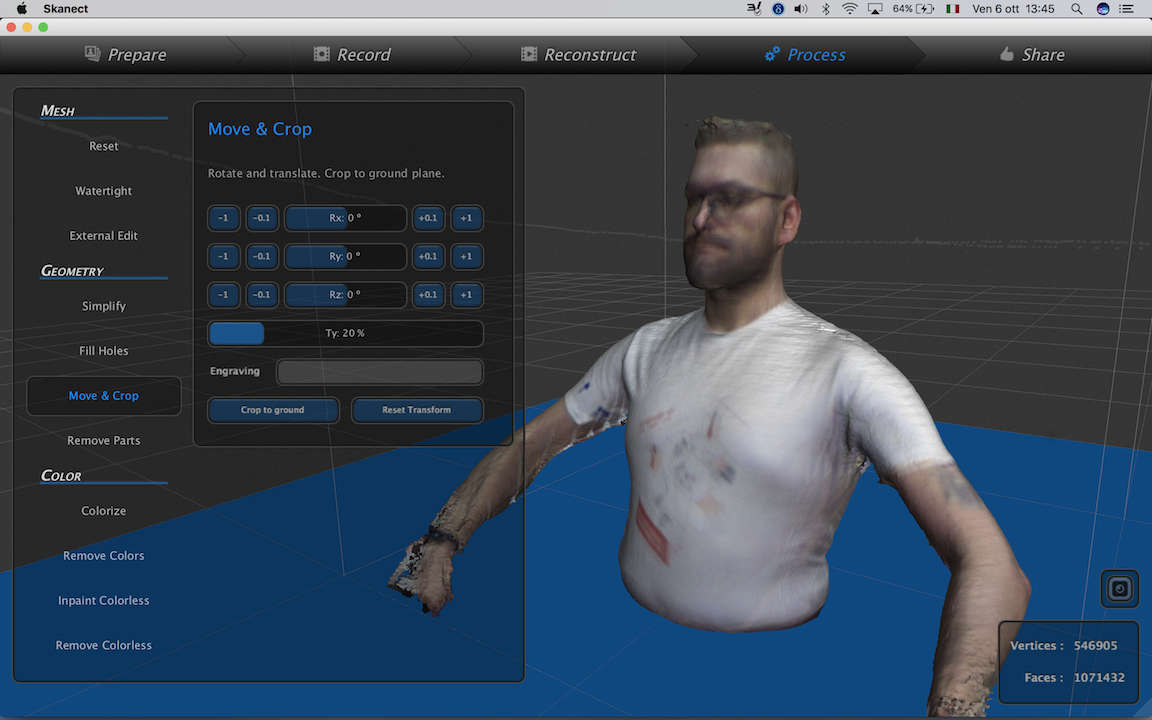
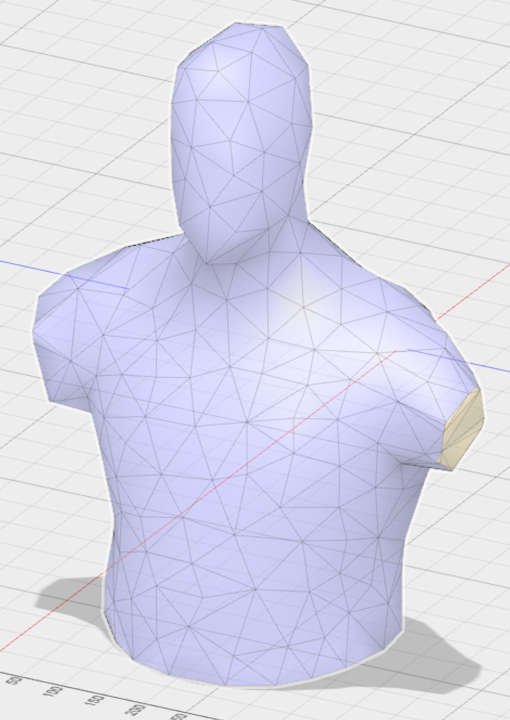
The scan with color applied.
Refining the scan
I used Meshmixer to cut away the parts that were not needed, the arms and legs. I used it to close the holes left on the top of the head and under the chin and to make my hair a little shorter. Eventually I decided to cut away the head totally.
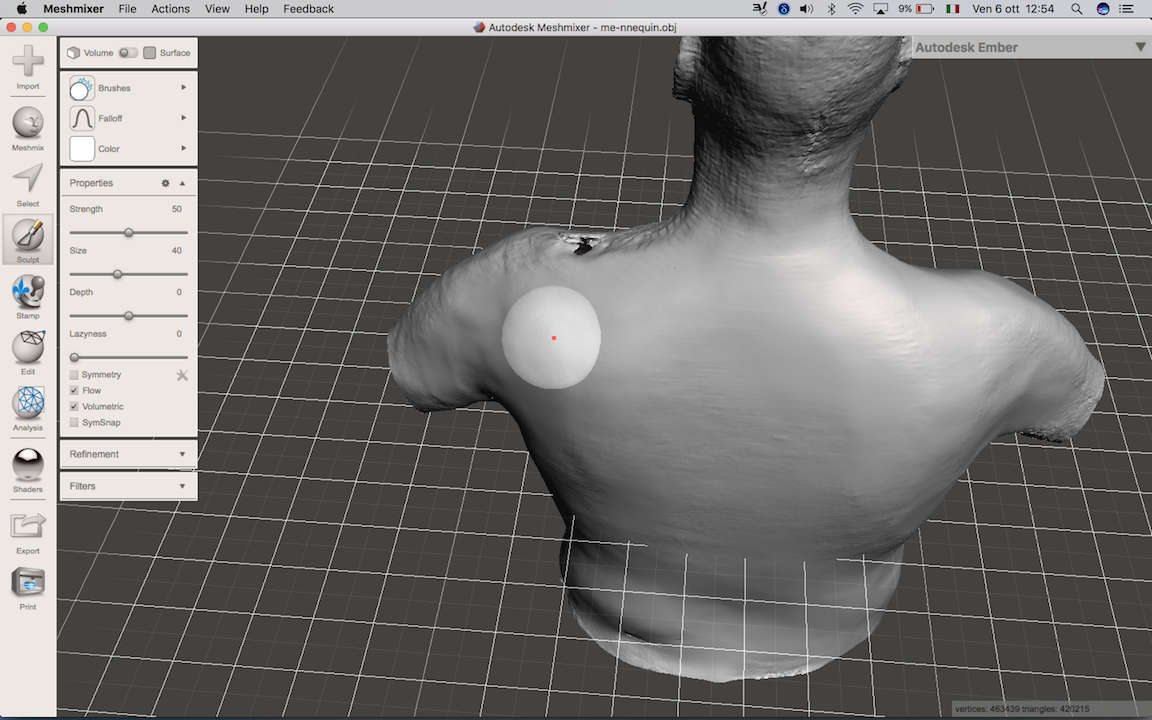
Refining the scan in Meshmixer.

Final mesh cleaned with Meshmixer.
Tring Fusion 360 Mesh controls
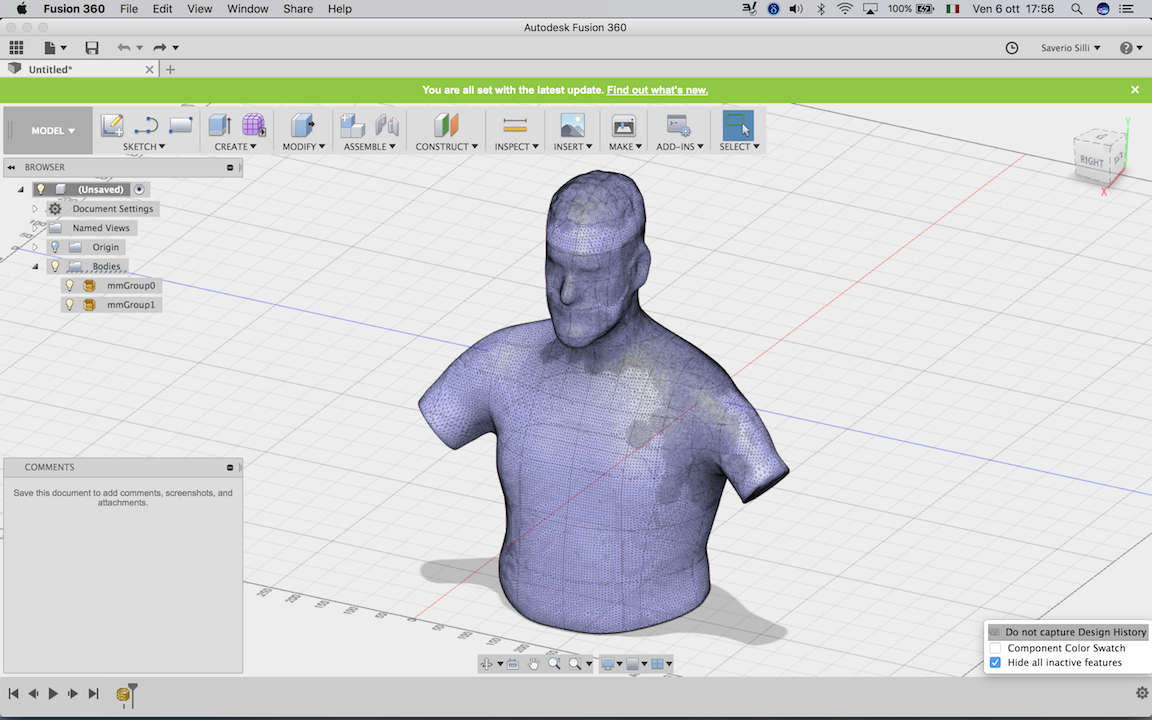
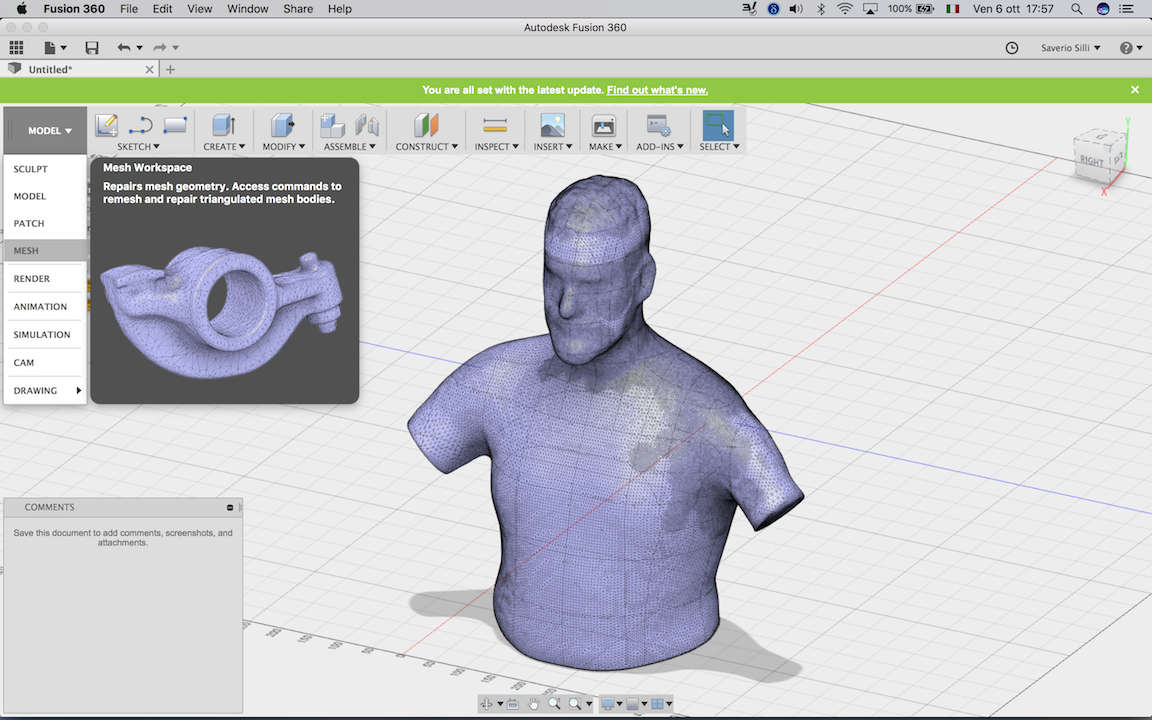
I was happy with meshmixer, but I wanted to experiment with the Adaptive Mesh controls in Fusion. Eventually I didn't made anything that I used, but I made some experience. Most important of all is how to get the Mesh menu in Fusion to show up. After importing the mesh you have to diable the History recording by clicking on the setting wheel on the bottom right. After that you will find the Mesh menu under the workspace menu in the top left. Also remember that to export a stl file you need to select "make on 3D printer" and then say that you don't want to use a specific software, but output to a file.
"Do not capture Design History"
Mesh Workspace.
Working on the 3D shape.
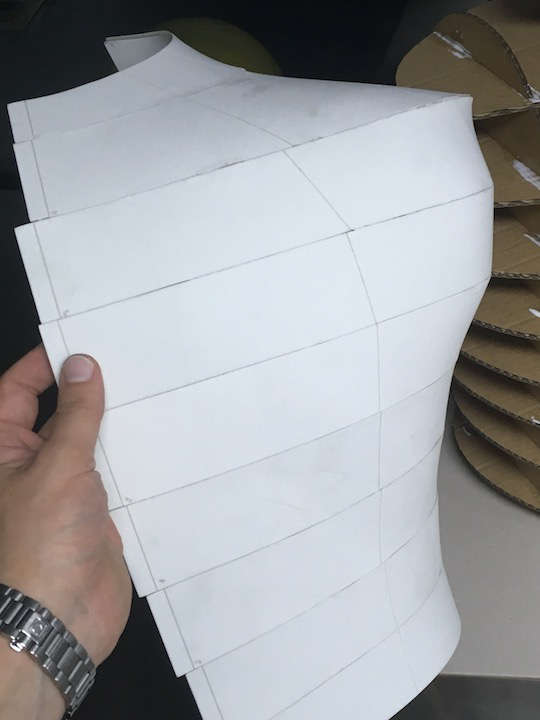
The next step after cleaning the model was to modify it and extract the geometry to fabricate it. I chose to use Rhino3D to work on it. First I tried To work directly on the mesh, but that didn't work. So I converted the mesh to a polysurface. This gives you a big solid shape that is composed of as many surfaces as the polygons of the mesh you had. The situation didn't changed much, as I wanted to have a smoother surface. So I created contour lines on the Polysurface, placed at 5cm of distance one by the other. That created 10 horizontal slices of the object. Then I made a loft between each couple of the 10 contour lines, in order to have 9 horizontal bands/strips surfaces. I unrolled these strips and layed them on a plane. I added some numbers for reference and some lines to help me reconnect the lines in the assembly phase
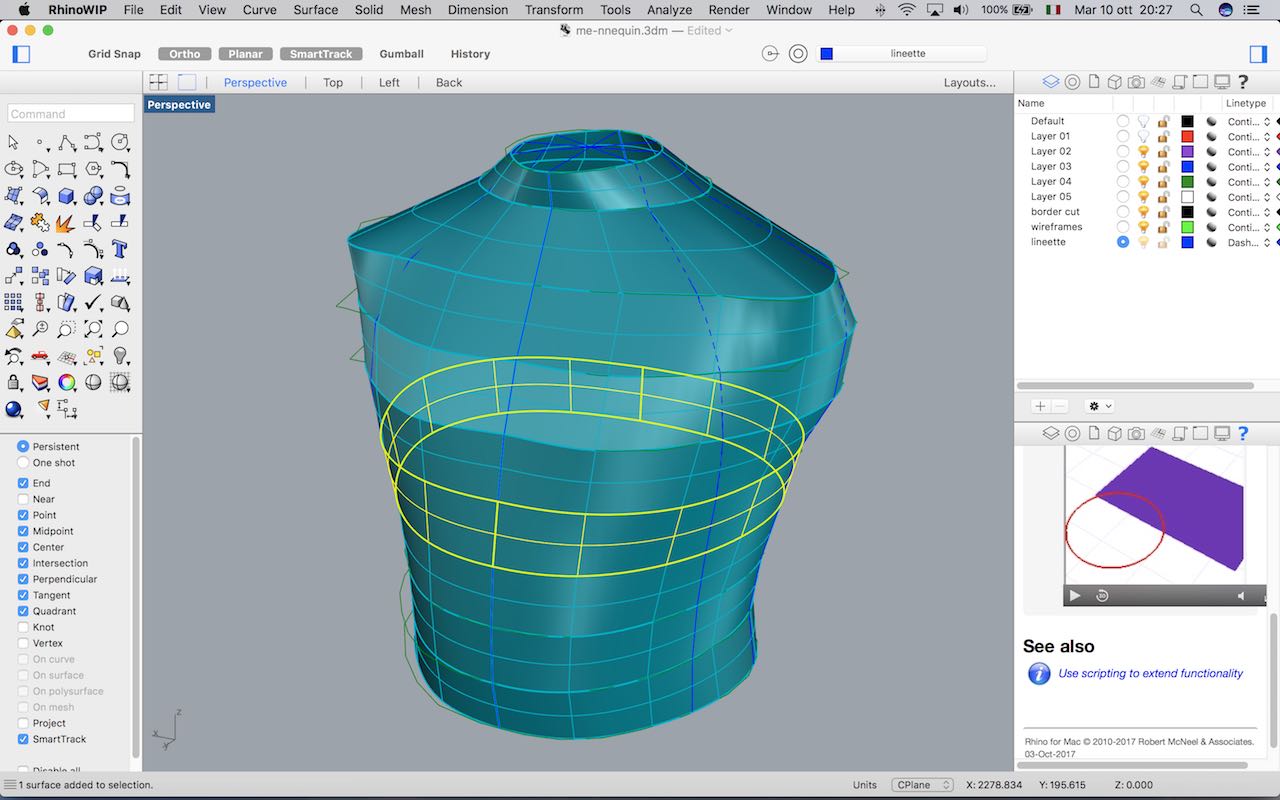
The Loft surfaces.
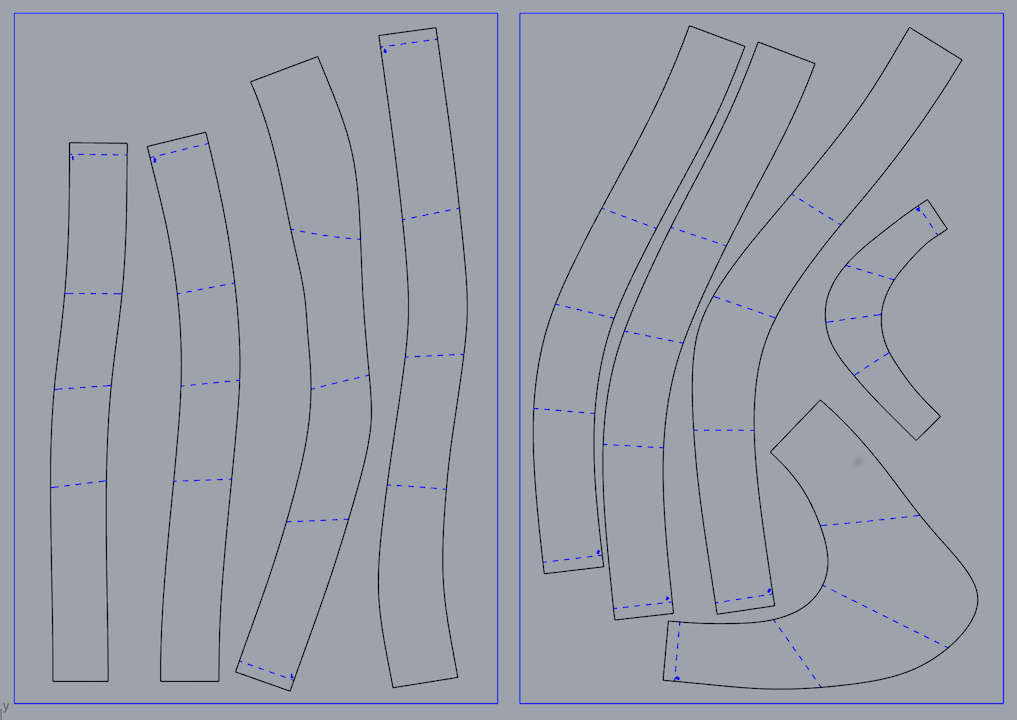
The same surface unrolled and nested, ready to be cut.
Fabrication and Assembly.
I used the lasercutter and a 5mm EVA foam sheet to make the outside surface coming from the strips. To add some structure to the me-nnequin I prepared an internal structure using Slicer for Fusion 360. The stl file I used in Slicer was a 5mm inside offset of the original one, to acount for the thickness of the EVA foam. I used interlocking slices as a built strategy.
Assembling the EVA foam strips just need some patience, a lot of Superglue and maybe a pair of gloves... but I didn't use them as I am used to get sticky fingers! The result is pretty good, the unroll tool from Rhino3D really gave me a nice shape to work on, there are some alignment problems, but never more than 5mm. I only fabricated half of the shell and I plane to make the other half in the next days.
Overall I'm very stisfied with how it is turning out, it is very realistic (even too much, when I'm in front of it, it feels like watching a naked myself), but I want to experiment with a puzzle seam on the horizontal bands to be able to get rid of the glue.
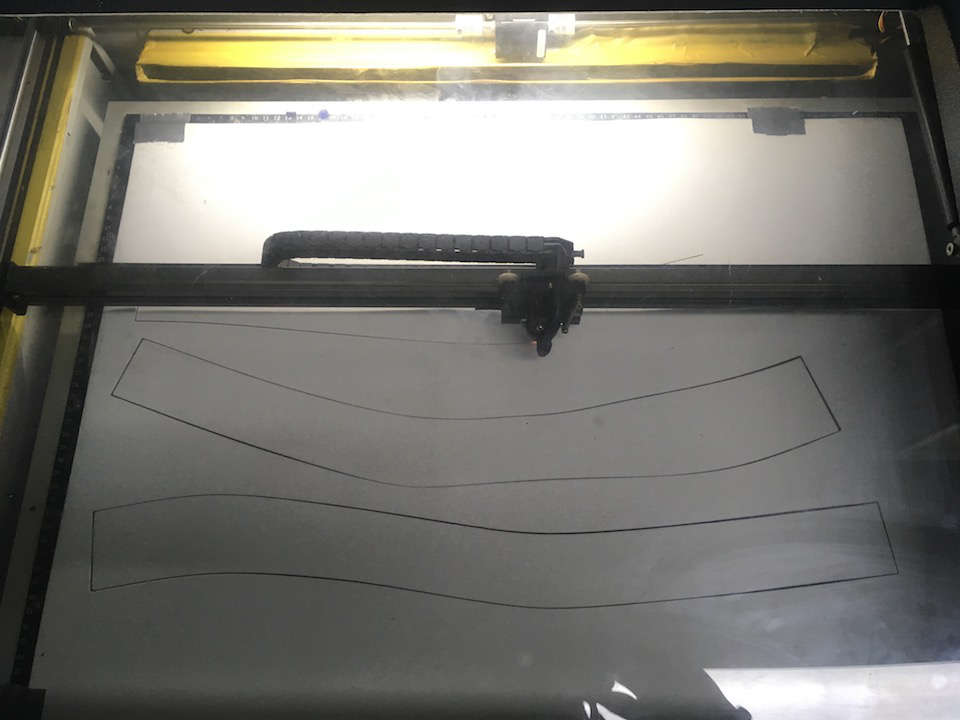
EVA Foam in the lasercutter.
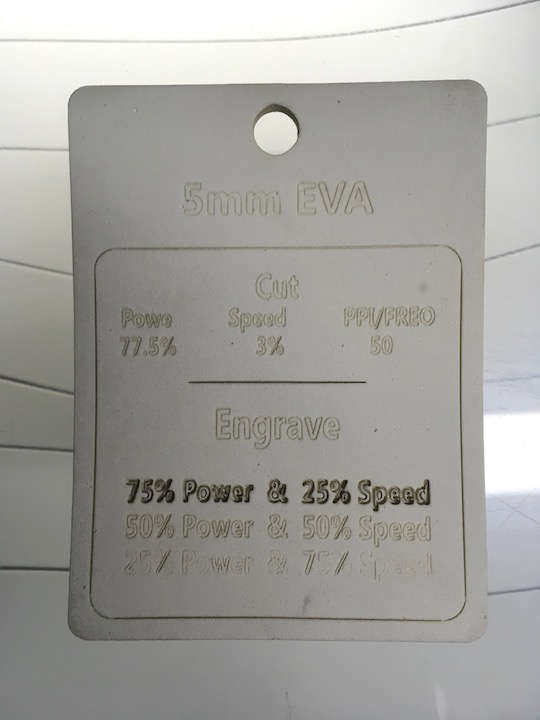
EVA Foam laser settings. I went up to speed 5.
Some issues are inevitable cause the foam is 5mm thick, but its flexibility helps in adjusting the shape.
The back of the assembly shows a pretty good final alignment of each piece.
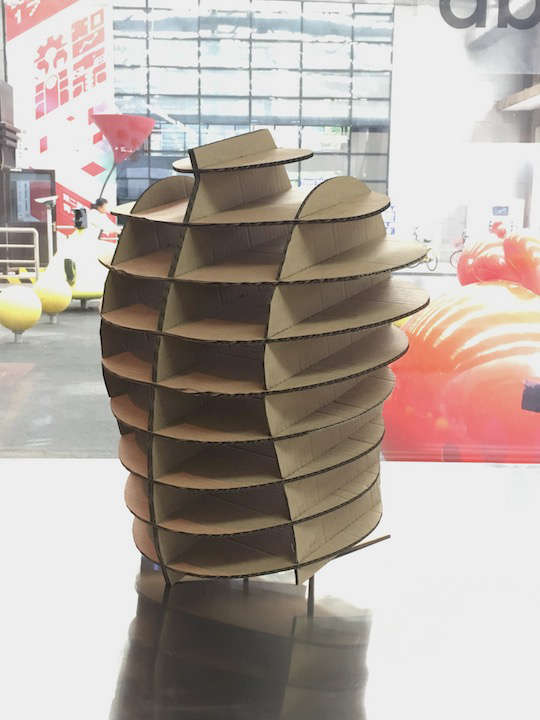
The internal support skeleton made with Slicer for Fusion 360 and modified interlocking slices
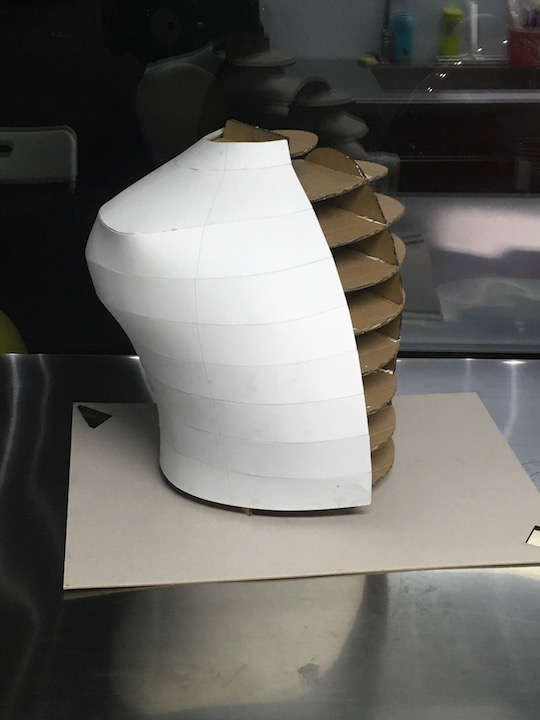
The final assembly (half of it). The EVA Foam shell perfectly adhere to the cardboard skeleton, thanks to the skeleton being 5mm smaller all around. The final shape is incredibly similar to the 3D scan, therefore to me: I am going to sign up to the closest gym, I sware!
Puzzle seam version.
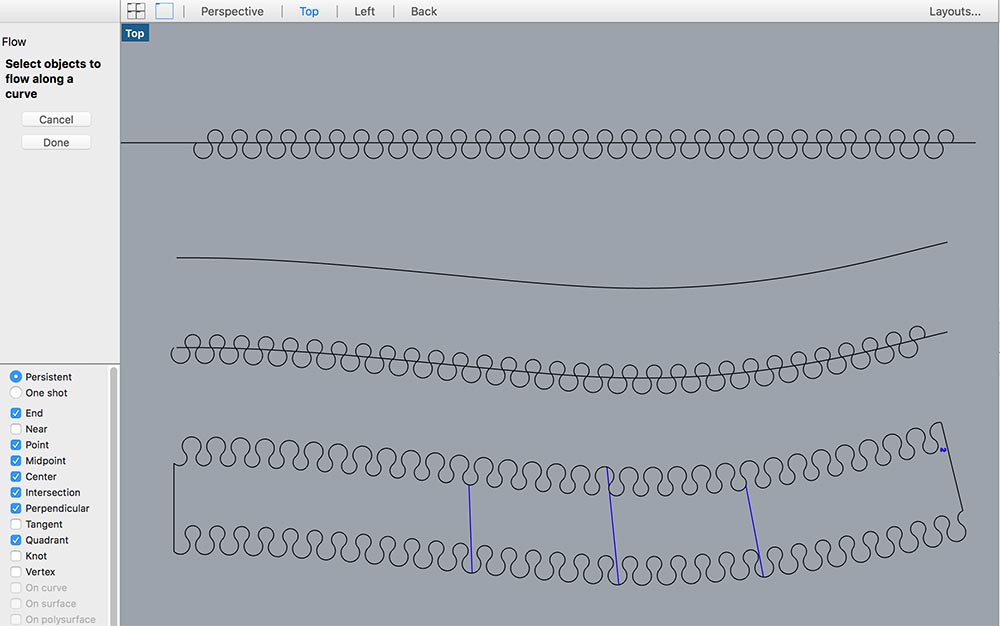
Assembling the EVA foam strips with superglue is a messy job and need much patience and experience to get to a good alignment. The work that has to be done requires too much experience. I tried to create a different way to assemble the shape by transforming the seam line between the stripes into a puzzle-like line. To make the seam adhere perfectly KERF calculation is crucial, so I made some test to get to the right size. The internal side of the seam has pretty smaller arches than the external side, to compensate for the huge kerf the laser leaves on such a material. Yet a little friction is desirable to make the seam stay in place by compression of the foam material. With the settings I described before, I am getting a kerf of 1mm, so I designed the smaller arch of 9mm diameter and the larger one of 11mm, in order to get both at 10mm diameter after the cut.
In Rhino I first created a basic module of the two arches (internal smaller, external larger) and then copied along a straight line. Then I used the command FLOW:


Puzzle seam stripes in the lasercutter.

Some of the stripes ready to be assembled
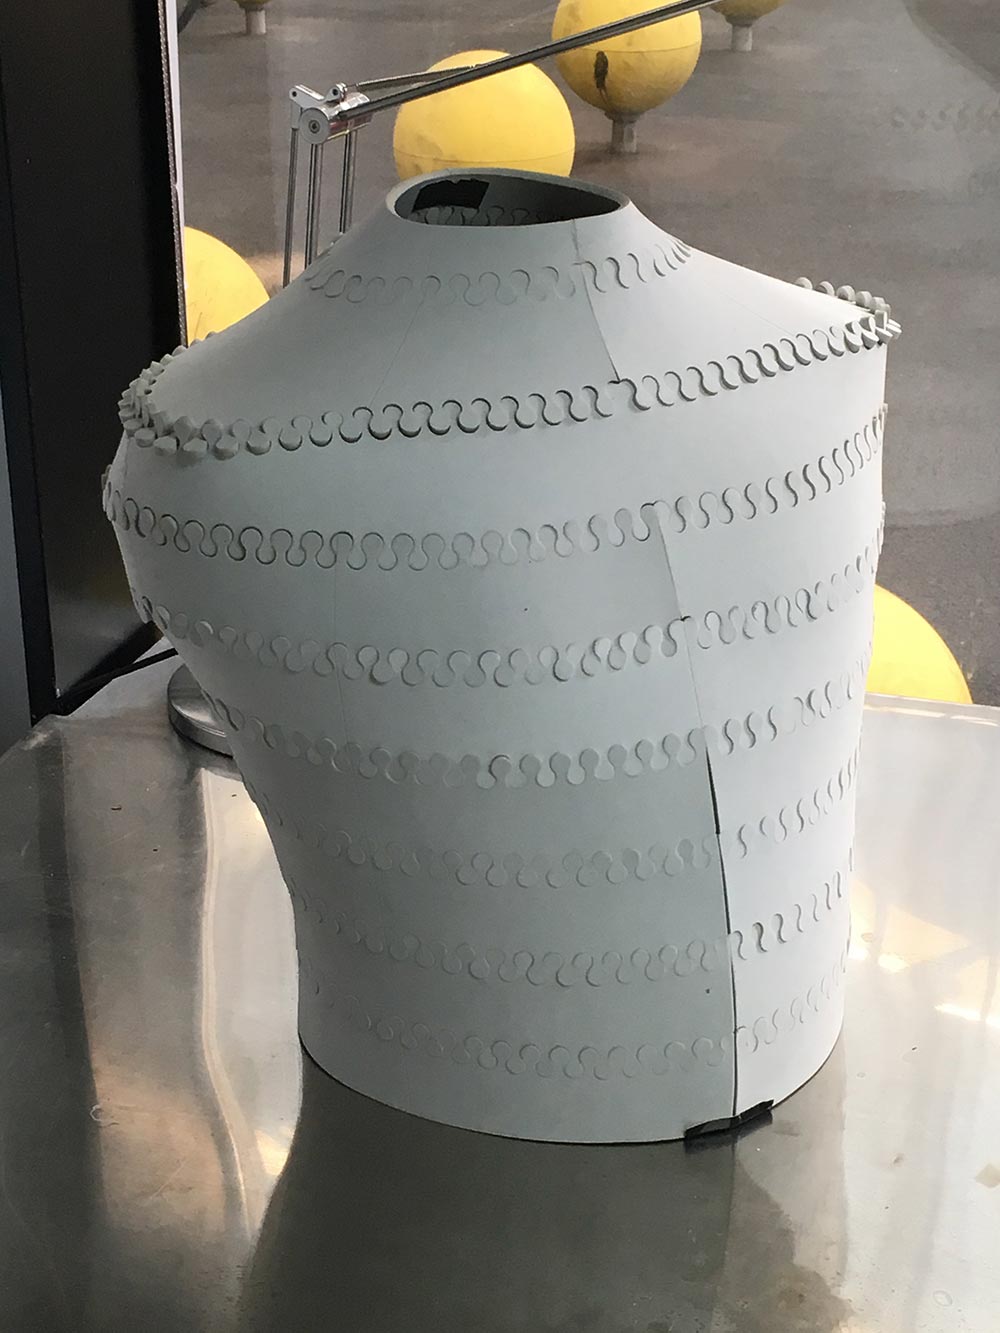
The assembled mennequin with puzzle seam.

The assembled mennequin with puzzle seam.

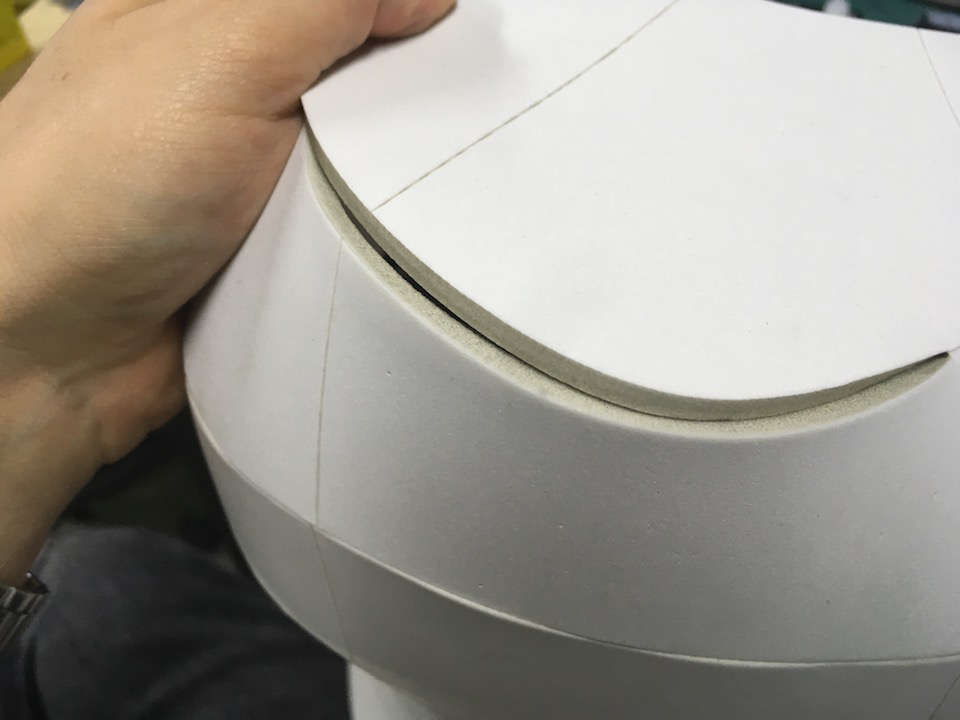
Detail of the puzzle seam.
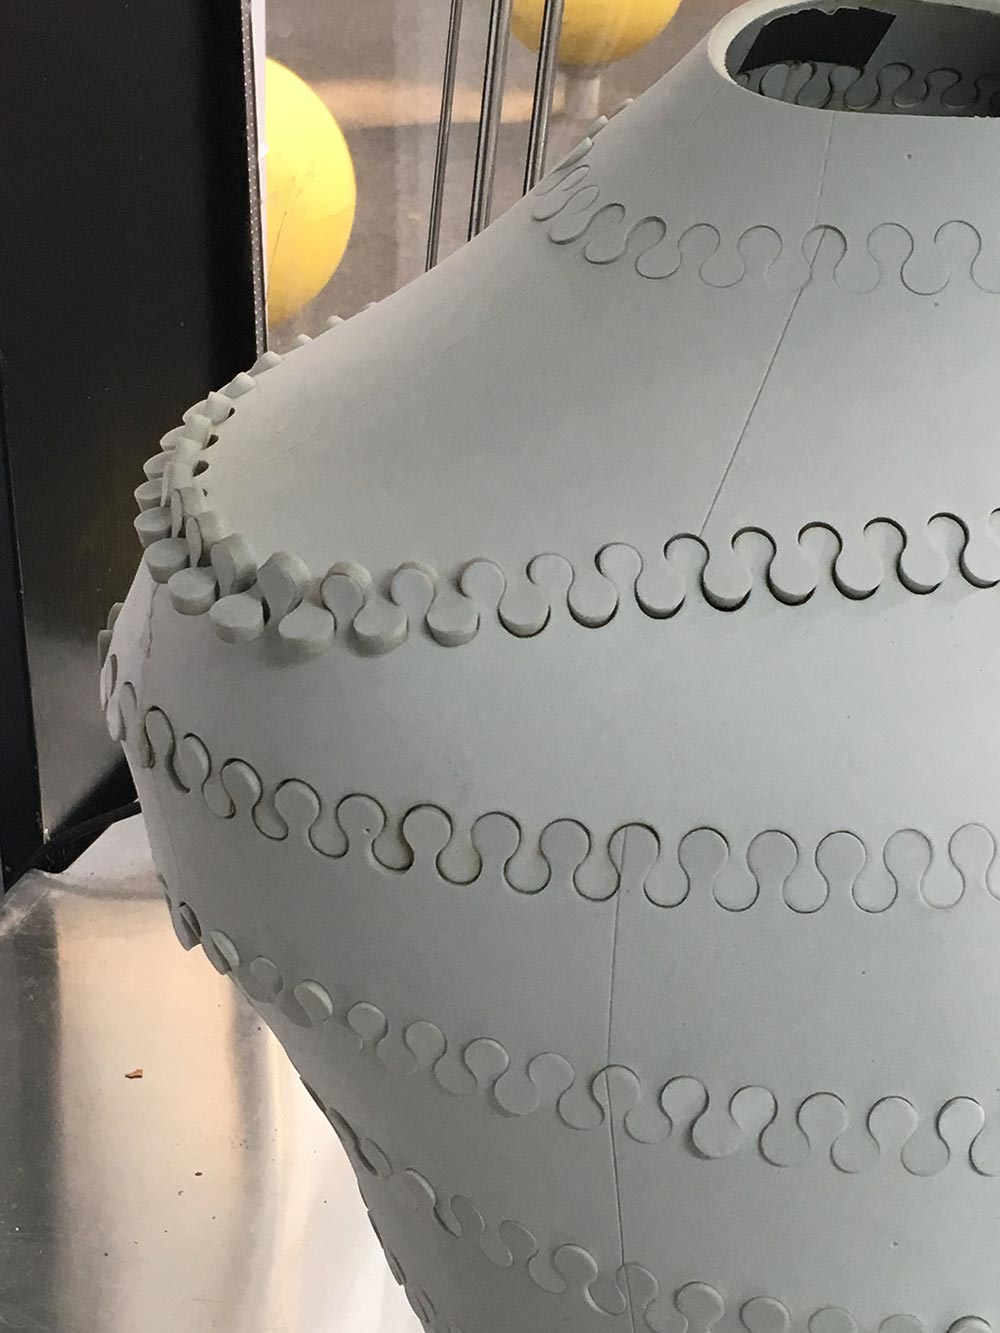
Detail of the puzzle seam.
Files Storage
This website by Saverio Silli (based on Twitter Bootstrap) and all its content is licensed under the following license: CC Attribution-Share Alike 4.0 International.